
 how-to
Managing Security for Multiple Locations: 2026 Guide
Table of Contents
- Why Managing Security for Multiple Locations Breaks Down
- Step 1: Audit Every Site and Map Your Vulnerabilities
- Step 2: Standardizing Security Protocols Across Branches
- Step 3: Centralized Security Management Software and Your Options
- Step 4: Hiring Armed vs Unarmed Guards by Site Type
- Step 5: Build Redundancy and Disaster Recovery Into the Plan
- Step 6: Budget the Migration and Justify the Cost
- Common Mistakes When Managing Security for Multiple Locations
- Frequently Asked Questions
Last Updated: September 16, 2026
Why Managing Security for Multiple Locations Breaks Down
Managing security for multiple locations fails most often because each site drifts into its own version of "normal." One property manager approves overtime for a guard who never logs a patrol. Another site quietly stops locking a rear gate. Nobody sees the pattern until an incident forces a review.
The Three Failure Points of Decentralized Security
Inconsistent staffing. Every site manager hires independently, so training, appearance, and response standards vary from one property to the next.
Step 1: Audit Every Site and Map Your Vulnerabilities
Start with a physical walkthrough of each location, not a review of last year's paperwork. A security consultant should visit every site, note entry and exit points, camera coverage, lighting gaps, and guard post positions, and document what actually happens on a normal shift.
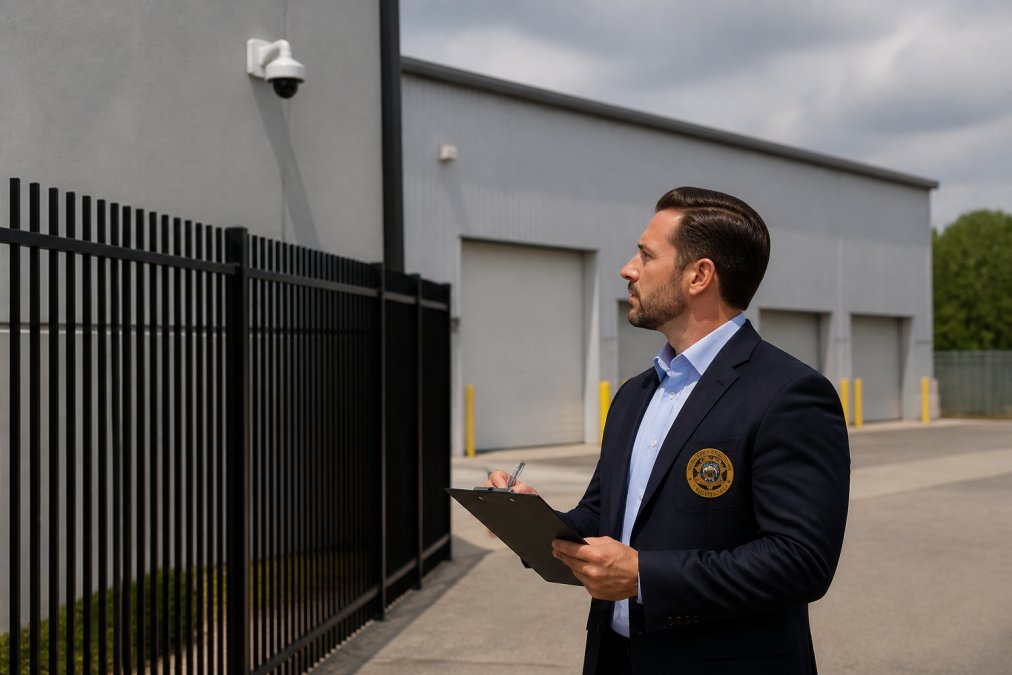
- Perimeter integrity: fencing, gates, and lighting condition
- Access points: how many doors, who controls keys or badges
- Camera coverage: blind spots, recording retention, monitoring status
- Staffing pattern: post orders, patrol frequency, shift handoff process
- Incident history: type, frequency, and time of day for the past 12 months
Step 2: Standardizing Security Protocols Across Branches
Standardizing security protocols across branches means writing one core rulebook that every site follows, then allowing narrow local exceptions. The core document covers uniform standards, patrol expectations, incident reporting, escalation contacts, and use-of-force policy.
What Belongs in a Site-Specific Addendum
Keep the master protocol short and apply an addendum per location for details that genuinely differ:
- Post orders for that building's layout and hours
- Local emergency contacts and response times
- Site-specific access control rules, such as a loading dock open only during receiving hours
- Any client or tenant requirements unique to that property
Step 3: Centralized Security Management Software and Your Options
Centralized security management software gives one dashboard for every location, combining guard tour data, incident reports, camera feeds, and access logs. The right platform turns scattered site reports into a single operational picture.
What to Look For in a Platform
| Capability | Why It Matters for Multi-Site Teams |
|---|---|
| Unified interface | One login for all locations instead of separate site tools |
| Real-time alerts | Escalation reaches the right manager within minutes |
| Role-based access | Site managers see their property; leadership sees everything |
| Audit trails | Incident records hold up if a claim or investigation follows |
| Integration support | Connects to existing cameras, access readers, and badge systems |
Evaluate whether the platform can integrate with your current hardware before committing. Replacing working cameras and card readers to fit a new dashboard rarely pays for itself.
Step 4: Hiring Armed vs Unarmed Guards by Site Type
Hiring armed vs unarmed guards comes down to risk profile, not budget alone. Armed officers suit sites with high-value assets, cash handling, or a documented history of violent incidents. Unarmed officers fit most retail, office, and residential settings where a visible, trained presence resolves the majority of issues.
Step 5: Build Redundancy and Disaster Recovery Into the Plan
Redundancy means no single failure takes a site offline. If a camera server dies, a guard tour app crashes, or a network connection drops, the location still needs coverage and a record of what happened. Most multi-site security plans stop at that sentence. The harder question is what actually happens at 2 a.m. when the internet goes down at a site two time zones away and the cloud dashboard goes dark.
The Connectivity Failure Scenario Nobody Plans For
Cloud-based access control and video surveillance depend on a live connection between each site and the platform. When that connection drops, the failure mode depends on how the system was designed:
- Cloud-only access control: If card readers authenticate against a remote server, a dropped connection can lock out every employee at that site. Some systems cache credentials locally for a limited window; others do not. Ask the vendor directly how many hours of offline operation the readers support and whether the door fails open or fails secure.
- Cloud-only video: Cameras may continue recording locally but stop sending alerts and footage to the central dashboard. If the local recorder is also cloud-dependent, you may lose the footage entirely.
- Guard tour and reporting apps: Mobile apps that require a live connection to log patrols will queue data or fail outright. If they fail, the site has no verifiable patrol record for the duration of the outage.
Layering Redundancy by Criticality
Not every site needs the same level of redundancy. A useful framework is to tier sites by the cost of an outage:
- Tier 1 (outage is unacceptable): Cash-handling facilities, data centers, healthcare sites with controlled substances, any location with a regulatory requirement for continuous monitoring. These need local failover hardware, backup power (UPS for readers and cameras, generator for extended outages), and a documented manual process that staff have actually rehearsed.
- Tier 2 (outage is tolerable for hours): Most retail, office, and warehouse sites. Local recording and cached credentials are usually sufficient; a manual patrol log covers the gap.
- Tier 3 (outage is tolerable for a shift): Low-risk sites where a guard presence alone is the primary control. A phone tree and a paper log may be enough.
The Manual Fallback That Actually Works
CISA guidance on network resilience and continuity planning outlines how organizations should plan for connectivity loss and system failure, which maps directly to multi-site security infrastructure.
Step 6: Budget the Migration and Justify the Cost
Migration costs vary widely by site count, existing hardware, and how much standardization is required, so pricing depends on the scope of each portfolio. Rather than quoting a flat figure, most providers scope the work site by site. That is true, but it leaves the person writing the budget memo with nothing to work with. What follows is a framework for building the number yourself.
The Cost Side: What Migration Actually Includes
A multi-site migration budget has five line items that are easy to underestimate:
- Hardware replacement or integration. If existing cameras and readers can be integrated, this line shrinks. If they cannot, you are replacing them across every site. Get a per-site hardware inventory before you accept any quote.
- Network upgrades. Cloud platforms need reliable bandwidth and, often, dedicated VLANs or firewall rules at each site. Older buildings may need new switches or cabling.
- Installation labor. Per-site labor scales with building size and after-hours work requirements. Retail and healthcare sites often require overnight installation, which carries a premium.
- Platform subscription. Usually priced per site, per door, or per camera, billed monthly or annually. Ask for the three-year total, not the first-year promotional rate.
- Training and change management. Site managers and guards need to learn the new system. Budget time for it; adoption failures are the most common reason migrations underdeliver.
The Cost of Doing Nothing
The other side of the ledger is what inconsistent security already costs. These are the numbers to pull from your own records:
- Guard no-shows and replacement coverage. Each uncovered shift requires either overtime or a last-minute replacement, both at a premium.
- Incident claims and liability payouts. Compare incident frequency and severity across sites; the variance between your best and worst site is a rough measure of what standardization could recover.
- Overtime from poor scheduling. Decentralized scheduling tends to overstaff low-risk shifts and understaff high-risk ones.
- Management hours chasing reports. Estimate the hours per week your team spends reconciling paper logs and text updates, then multiply by a loaded labor rate.
- Insurance premiums. Some carriers offer credits for documented, centralized security programs. Ask your broker before you build the case.
A Simple Payback Calculation
- Total the annual cost of the five 'doing nothing' items above. Call this your current annual security overhead.
- Estimate the annual cost of the migrated system: subscription plus any incremental labor for the new platform.
- Subtract the migrated cost from the current overhead. The difference is your annual savings, before counting incident reduction.
- Divide the one-time migration cost (hardware, installation, training) by the annual savings. The result is your payback period in years.
FEMA guidance on risk assessment and continuity planning offers a framework for weighing security investments against actual risk, which helps when presenting the case to ownership or a board.
Common Mistakes When Managing Security for Multiple Locations
The most expensive mistake is treating every site as identical. A single protocol applied blindly to a retail store, a warehouse, and a healthcare facility ignores real differences in risk and creates gaps.
Other recurring errors:
- Choosing a vendor on price alone, then absorbing no-shows and retraining costs
- Skipping the audit and buying software before knowing what each site actually needs
- Letting each location keep its own reporting format, which makes portfolio-wide analysis impossible
- Failing to verify insurance and licensing before a guard sets foot on site
- Never testing the disaster recovery plan
Frequently Asked Questions
What are the 5 key components of security management for multi-site businesses?
A workable multi-location security program rests on five parts: a written protocol set that applies everywhere, a centralized security management platform that feeds every site into one dashboard, a staffing model that matches guard type to site risk, a redundancy plan for network and power failures, and a compliance map covering the rules that apply at each property. Skip any one of these and you get the gaps that show up as no-shows, blind spots, and inconsistent incident reports.
How can I centralize security monitoring across different locations?
Start by confirming every site has adequate bandwidth and a backup connection before you add cameras or access readers. Then choose a platform that supports a unified interface, role-based access, and real-time alerts, so a single operator can view cameras, door events, and guard patrol data from all properties. Migrate one site at a time, keep the old system running in parallel for a few weeks, and train your monitoring staff on the new dashboard before you cut over the rest.
How do you balance armed vs. unarmed guard requirements across different sites?
Match the guard type to the actual risk at each property, not to a company-wide default. Retail centers, apartment communities, and office buildings usually run well with unarmed officers focused on visibility and de-escalation. Sites handling cash, high-value inventory, or known threats often need armed officers, who carry additional insurance, training, and licensing requirements. Document the reasoning for each site so your liability position is clear if an incident is reviewed later.
How do you maintain consistent security standards across geographically dispersed locations?
Write one master protocol covering patrol routes, incident reporting, escalation steps, and post orders, then let each site add a short addendum for local conditions like loading dock hours or a hospital's behavioral health unit. Use a guard monitoring system with a client portal so supervisors can verify patrols happened and review reports in real time. Schedule quarterly audits that rotate through sites, and treat repeat findings as a training issue rather than a one-off.
Managing security for multiple locations gets harder as you add sites, not easier, unless the systems scale with you. Elite Police Protection handles multi-site coverage with off-duty, retired, and prior law enforcement professionals, a guard monitoring system that feeds a single client portal, and armed or unarmed officers matched to each site's risk profile. Get started with Elite Police Protection and build one consistent security standard across every property you manage.